JForms Documentation
Please note: These docs are a work in progress and do not currently cover all of JForms features.
Download JForms
If you're planning to use JForms plugins download the full package. If however you plan to use it only as a contact form, download download the module only version.
Installation & configuration
Install the module in Joomla, then open it in the module manager. Publish it to the position and pages you require, then click the options tabs where you will see following settings:
Basic Options
Form
Select a form XML to use for your module. To use your own forms upload them to /modules/mod_jforms/forms/.
Introduction text
Enter text to display above the form
Thank you message
Enter a message which will be displayed after successful form submission.
Submit button text
Enter the text you would like to appear on the submit button.
Email Settings
Set up and customise the email sent by JForms.
Send email
Choose whether to send the form data via email. If you select no all following settings will be ignored.
Email destination
Enter a valid email address where the form data will be sent to.
Whilst you could have the destination email static eg. [email protected] it can also be dynamic to be sent to a user entered value.
If for example you want to send the email to the user and you have an email form field you could enter {email}.
Email subject
Enter a subject for the email that will be sent. The same goes for the email subject as for the email destination so it could be static eg. Website Enquiry, or use form data eg. {subject}.
Email text
This is where you create the template of the email. It supports HTML and just like the destination & subject you can use placeholders for the form data for example {email}. To display all the form data in a list use {fields}.
If for example your form fields were name, email, subject & message you could format your email in the following way:
<p>You have just received a new message from <strong>{name}</strong> - {email} regarding {subject}</p>
<p>{message}</p>
AJAX Settings
Use Ajax to send form
Select this option to submit the form without reloading the page.
Custom Functions
Execute custom JavaScript functions. To use your own functions upload them to /modules/mod_jforms/functions/.
Using JForms plugins
Important! JForms Framework system plugin is required to run JForms plugins.
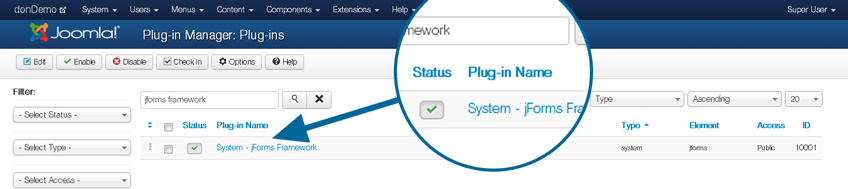
If you installed the JForms Full Package you already have this and just need to publish it, if not, download it now.
Download JForms Framework v1.1
Google Spreadsheets Plugin
Install the Google Spreadsheets plugin in Joomla, then configure & publish it in your plugin manager. You will need to enter your Google username and password.
Important information for GMail Users
If you are using GMail (rather than Google Apps) you will get blocked on the first call of the API. To fix this, open a JForms module in your module manager after setting up the plugin. You will see an error. Now head over to [gmail.com] and sign in, you should see a notification about access to your account. Authorise access and you're good to go ;)
Open the JForms module which you wish to use in your module manager, click on the options tab and scroll to the bottom. You will see a new set of options called "Google Spreadsheets" with the following options:
Save to spreadsheet
Choose whether to send the form data to a Google Spreasheet. If you select no all following settings will be ignored.
Select spreadsheet
Select which spreadsheet to save to form data to.
Note: Use a blank sheet as all the row headers etc. will be created automatically.
YMLP Plugin Instructions
Install the plugin in Joomla, then configure & publish it in your plugin manager. You will need your username and API key from ymlp.com
Open the JForms module which you wish to use in your module manager, click on the options tab and scroll to the bottom. You will see a new set of options called "Your Mailing List Provider" with the following options:
Save to mailing list
Choose whether to use the YMLP plugin for this form. If you select no all following settings will be ignored.
Overrule blacklist
If you select yes the user will be subscribed, even if he or she previously unsubscribed from your mailing list.
Select mailing list
Choose which mailing list to subscribe the user to.
Map YMLP fields
Map your form fields to the fields in YMLP. Use the field names you specified your form XML for example {email}.
Notice how the name is in squiggly brackets, this tells the plugin to use the data from the form.
To pass a static value to, for example, track where they signed up from, just enter standard text eg. Website Contact Form.
Creating custom forms
The module builds forms from XML using Joomla's inbuilt JForm class. Here is an example of a form XML file.
<?xml version="1.0" encoding="UTF-8"?>
<form>
    <fields>
        <fieldset addfieldpath="/modules/mod_jforms/elements">
            <field name="name" type="text" default="" label="Name" description="Your name" required="true" />
            <field name="email" type="email" default="" label="Email" description="Your email address" required="true" validate="email" />
            <field name="phone" type="tel" default="" label="Phone" description="Your phone number" validate="tel" />
            <field name="message" type="textarea" default="" label="Message" description="Leave a message" required="true" rows="10" />
        </fieldset>
   </fields>
</form>
This would output a form with fields for name, email & message.
To add extra form fields simply add them within the fieldset tags following the same format.
For a list of all the available field types visit http://docs.joomla.org/Standard_form_field_types
Once you have created your XML file, upload it to /modules/mod_jforms/forms/, then open JForms in the module manager and click on the Options tab. Your newly created form is now available in the form dropdown on the basic options in the module manager.